
Demo Day
- Katie
- Jan 23, 2022
- 8 min read

Updated: Mar 30, 2022
Welcome to Shiawassee Street (Part 2)
As you could see in part 1, the Shiawassee Street House was a sight for sore eyes when I first bought it. With a hole in the roof, absolutely crazy colors painted everywhere, and nearly everything needing to be replaced, some might have said I was way in over my head (and they were probably right). If you didn't get a chance to check out part 1 to see where this all started - check it out here: How I found Interior Design; Welcome to Shiawassee Street (Part 1).

But I was excited to be taking part in helping revitalize a historic neighborhood in Lansing, while turning this run down house into my dream home! Once I signed on the dotted line for this house, my first step was to bring in the professionals to do all of the major items that I could not do myself. Roofers had their hands full replacing the roof that had a giant hole in it and also included a giant flat roof for the rooftop deck on top of the garage. The house had the original knob and tube wiring so the electrician had to channel through the lathe and plaster walls to run new wiring throughout. The home also had a furnace from likely around the 50’s and no air conditioning. The HVAC company replaced the furnace and added an AC unit strong enough to ensure I would be nice and cool on the second floor where all of the bedrooms were located during the hot and humid months in Michigan. Luckily this house had existing ductwork throughout the walls so that did not need to be added.
the demo plan:
The first part where I really come in was everyone’s favorite day to get all of your aggression out - demo day! Or in this case, demo week! There was so much to demo in this house and a 100-year-old house is not your normal demo of drywall and things put together with trim nails! The saying "they don't build things like they used to" could never be more true when you are having to take out construction that was built 100 years ago!

There were key areas I needed to focus on in order to move forward with aspects of the design that would be carried out by other trades and also areas of the house that needed to be complete in order for me to move in. My primary areas of demo focus were: the main bathroom, removing water damaged ceilings in bedrooms as a result of the hole in the roof, the side room behind the kitchen with powder room, the rickety picket fence, and removing the dining room ceiling to allow it to tie into the kitchen ceiling later. My original plan was to hold off on demolishing the kitchen until a later date so I could still have a somewhat functioning kitchen for as long as possible when I moved in. But I also wanted to maximize the dumpster with everything else while I had it. I also needed to get the bathroom put back together, the bedroom ceilings drywalled and painted, and a new fence put up (for the doggies) before I could move in. I got a 40 yard dumpster for this step (and I ended up paying extra for over weight - plaster is HEAVY!)
the main bathroom:
I started with the main bathroom. It had been redone at some point before, likely in the 70's. It had pink 4“x4” square tiles with a cast iron slide in tub and pedestal sink. The flooring was made of approximately 8"x8" concrete-looking tile with giant grout lines. At some point, someone also decided to pair olive green paint on the walls and trim with the pink tile... wasn't a great look!


I didn’t really know what I would find when I started the demo but jumped head first. The slide in tub was cast iron and insanely hard to move. I planned to reglaze and reuse the tub so I didn't really want to take it too far and I was demo-ing the bathroom by myself so I just kinda slid it out and moved it to demo around it. I'm not sure how much it weighed but just guessing around 200+ pounds! Yikes!

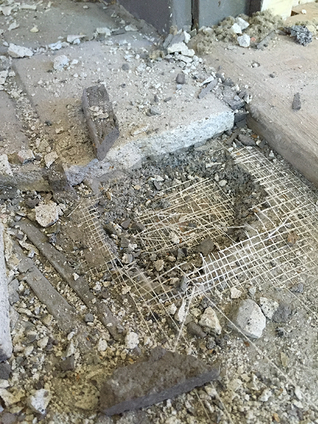
The pink tiles came off the wall pretty easily but behind the tiles were lathe and plaster walls and wire mesh and plaster in the shower. If you have ever had to take out a wall with wire mesh and plaster, you know that it is rough work to say the least. There were so many many scratches on my hands and arms!! My original thought was only to demo what I needed to of the walls and leave as much as I could to reduce the amount of demo and materials I had to replace.


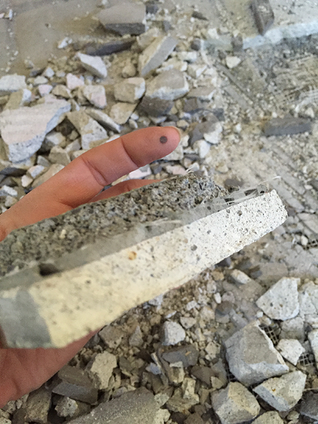
The floor tile was probably the worst, though. The tile was close to an inch thick and attached very well to the cement board underneath. When I say thick, I mean, some of the thickest tile I have ever worked with. You can see the thickness in reference to my finger in one of the images below. (And I don't have super small, petite hands. I'm a 6'1" athlete with hands that my fiancé calls man-hands because they are as big as his! The blood blister is a war wound from a different project!)
As I used my sledgehammer, prybar, floor scraper and everything I could possibly find in my arsenal of tools to rip up that floor, I felt like I was averaging about 1 square foot of materials torn out per hour. After getting through about 85% of the floor and working all day at it, my friend Mike came over to see what I had accomplished. He must have felt bad for me based on the texts full of profanity and angry emojis and came to see what he could do and brought a magical tool that I didn’t know even existed for demo! A giant pickaxe!! He popped that thing under the cement board and pulled it up all in one fell swoop… 2 minutes later, the floor was done! I didn’t know if I should hug him or yell at him for not coming over to save me earlier!


On Sunday, after the floor was FINALLY out... I realized that the side wall that enclosed the tub/shower was barely hanging on and basically not supporting anything. My friend Ericka was over to keep my company while I continued my demo and cheered me on while I got rid of this wall. For how flimsy it felt... it sure took awhile and a lot of tools and a lot of profanity to finally get down!


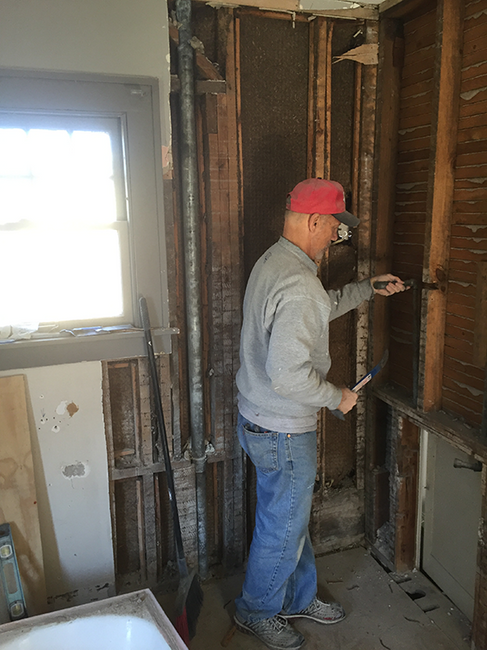
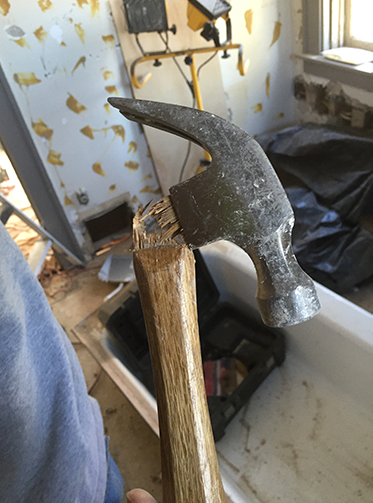
The next weekend, my dad came into town to help, and after looking at everything in the bathroom... we decided that all the walls inside the shower needed to be taken out and replaced. We probably could have made the old walls work, but I couldn't say with confidence that there wasn't water damage or something hiding inside them. Also, we also came to the conclusion that it would probably be easier to start from scratch when putting new materials back in. So another round of bathroom demo! Only one minor casualty in this round (apparently wood handled hammers are no match for wire mesh and plaster)!


the side room+powder rooM:
So the side room was this strange very small room off the backside of the kitchen. It had a very small powder room and some shelving where a microwave was kept from likely the most recent homeowners, but I can't really figure out what the original purpose of this room was for when the house was built in 1919. Here is a quick floorplan sketch of the main floor from memory - not 100% sure on room sizes but this is pretty close. You can see in blue where this small side room/powder room was located.

This space wasn't imperative to moving in, however, I didn't want to have to get multiple dumpsters over the course of this renovation so I decided to take down everything in this small room and powder room while I had the 40 yarder.
Here's how it started:


Here is during demo:


I'm not sure why I didn't take any pics of the powder room during or after demo... I'm guessing I was just grossed out after hauling out that toilet. If you have ever had to take out a toilet or even watched it done on HGTV, you know how incredibly gross it is. Especially one like this!
Unfortunately, as you can see in the pic of the powder room before image, there were not the original hardwoods, nor under the shelving area. This was a huge bummer as I would have loved to keep the hardwoods in this area when I put everything back together. Also as I was tearing out the lathe and plaster, I found that underneath, someone had added some blown in insulation on the North wall. This wall was shared with the garage so I am assuming this was done at some point to keep this room from becoming freezing. Once I saw the blown in insulation, I was very careful in my demo to keep the blown in insulation intact to reuse it. I covered it with plastic sheeting so I could put walls back over it later! I wasn't 100% sure yet what my plan was for this room, but I had some ideas brewing and I love a blank slate of a room down to studs!
After demo:

Bedrooms:
The bedrooms didn't require as much as many of the other spaces in the house. Two of the bedrooms had pretty major holes in the ceiling from the water that had poured through the giant hole in the roof (remember the blue tarp on the roof from last week's post?). The ceilings must have been wallpapered at some point because strips of it were hanging down from the ceiling. The third bedroom, although the ceiling was intact, had a wallpapered wall that needed to come down so I got to work on removing the damaged ceiling and the wallpaper on the wall.


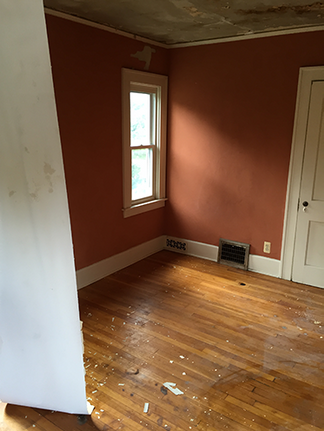

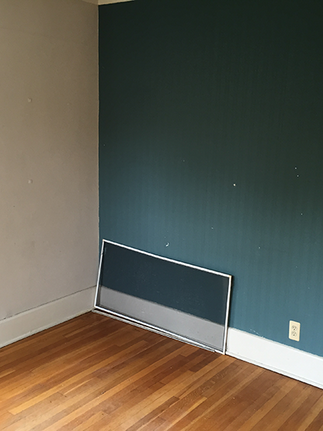
The ceilings down came down about like the others in the house, but had the advantage of already having a large hole in them! The wallpaper on the wall was a struggle at first, but I went out and got this handy little scoring tool and wallpaper remover and it worked like a charm (not getting paid to promote this, just would really recommend it - get it in the paint section at Home Depot)! Those little spikes on the bottom of the scoring tool allows for the wallpaper remover to get underneath the wallpaper so you can then scrape it off with a scraper!


The fence:
The fence was in pretty rough shape with missing sections and peeling paint every where. Not to mention, the design of the pickets was not consistent with the 1920's when the house was built, nor was it at all modern. In other words... it was ugly!! So it had to come down so I could put a new one back up. I had two pups coming with me in the move that needed a yard!
Fence before:


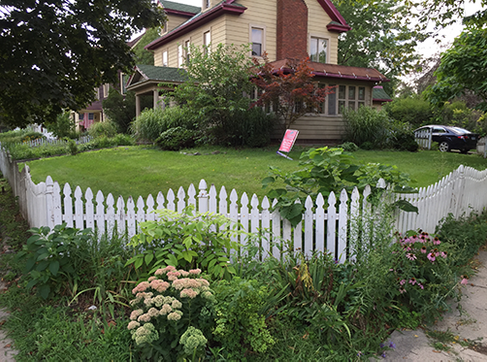
Luckily, because it was in pretty rough shape, it was pretty easy to take down. I was able to take down whole sections at a time. I left the center posts up until I was ready to rebuild the fence so the holes were partially dug for the new support posts. As I looked at the sections of old fence, I thought pieces of it looked pretty cool so I saved it in the garage for some inspiration later! (If you can't wait to see what this turned into, you can check out the finished product on the MCDW Projects page - but we will also reveal in a later post!)


It was a LOOOOOOOOOONG week of demo in between working my day job which was also long hours! Needless to say, I was exhausted! But the fun was only just beginning! With a blank slate in several of the rooms, it was time to start designing and putting things back together!
Check back next week to see the progress I made when I started putting things back together! And spoiler alert... putting things back together may have resulted in a Katie-shaped hole in the kitchen ceiling!!! I hope this may give you a little inspiration for your project!
- Katie

Comments