How To Paint Perfect Walls
- Katie
- Aug 10, 2022
- 6 min read
DIY How-To’s

Let me kick off this post by saying I am in no way a professional painter, and the professionals likely have much better tips than I do… but I have painted a lot of walls, ceilings, and trim in the 6 different homes I have lived in! Some of what I have learned is from my parents who have always been avid DIYers and always painted all of their own properties as well. Some of what I have learned is by trial and error. And the rest is from reading tutorials and following different forums and pages that are contributed to by the professionals. Oh, and I ask a lot of questions at the paint store!!!
So let me share with you what makes my walls and ceilings pretty dang good - especially for never hiring it out! So I first want to start out with hands down the most important part of the paint process… PREP. If you follow me on Instagram (if you don’t, please do! @motor_city_designworks), you know that I share a lot of DIY tips for the average homeowner and you have also seen several posts/reels revolving around paint prep and its importance! You can be the best painter in the world, but if you don’t prep your walls/ceiling/trim, it is all going to look like crap!
So my house is about 50 years old and has had several coats of paint, holes filled, etc. And I can tell you at least the last several times it was painted, it likely got no prep at all judging by the pretty crappy condition of the walls. So let me lay out my process, step by step. I will also say that this prep process is for smooth drywall. I never knew until I started meeting people in the design + renovation industry across the country that smooth drywall is not the standard everywhere (which absolutely blows my mind and I’m sorry for all of you that have to have textured walls, that sucks). The prep process is in attempts to get the walls as smooth as humanly possible!
Prep Process:
1. Clear everything out you can or cover everything… it is going to get dusty and messy!
2. Walk through your walls and ceiling with a flashlight or shop light right up close. This is going to highlight all of the imperfections in your walls. You can do one of two things when you find an imperfection. Either fix it on the spot or circle it with a pencil so you know where to go back to.
3. Take drywall mud (I think this is easier than spackle since you are typically doing larger areas) and fill all holes, divots, scratches, etc. The thicker you go, the more sanding you will have to do later. You will have to do 2 coats anyways. Let completely dry.
4. Sand down all of the walls - both the areas you filled and any bumps, ridges, fuzz or whatever imperfections you identified in the previous paint during Step 2 (you can sand these bumps in step 2 as well, but I like to limit the amount of times I get all dusty). Usually you can see the previous paint color or colors once you start sanding these bumps!
5. Put a second coat on the areas you filled. Some won‘t need a second coat, most will. The drywall mud will suck into the holes. Sometimes I need a third coat depending on the wall. Or there has even been times where I decided to skim coat the entire wall because it was in such poor condition.
6. Sand everything down one last time!
7. Don’t skip this last step - it will erase half of what you did previously! Get a bucket of warm water and a clean rag. Sometimes I add a little Ammonia to the water if the walls were dirty before you started the process. Wipe down all of the walls and ceiling. You need to get all of the dust and crap you just sanded off!

As you can see, between multiple coats of drywall mud and sanding, this can sometimes take days depending on how bad the walls are and how large the holes you filled are. But seriously, don’t skip the prep. Don’t waste all of your time to paint if you aren’t going to take the time to make them look right!
OK, now time for the much more fun part (although some people hate painting as well)! IMO, painting is the most cost effective and diy-friendly project you can do that makes THE BIGGEST IMPACT!! Nothing can really change a space as dramatically and inexpensively as paint can. Period.
Here are my steps to painting beautiful walls:
1. If you did a lot of wall repairs with drywall mud... consider priming the walls first. It won't take an extra step - if you don't prime first, your drywall mud will show through your wall paint and require an additional coat like in the image below. Same number of coats - but primer is cheaper than wall paint!

2. Cover your outlets and top of trim with painters tape. Don’t be lazy like me. You will miss and get on an outlet and you will get paint splatters on the top of your trim.

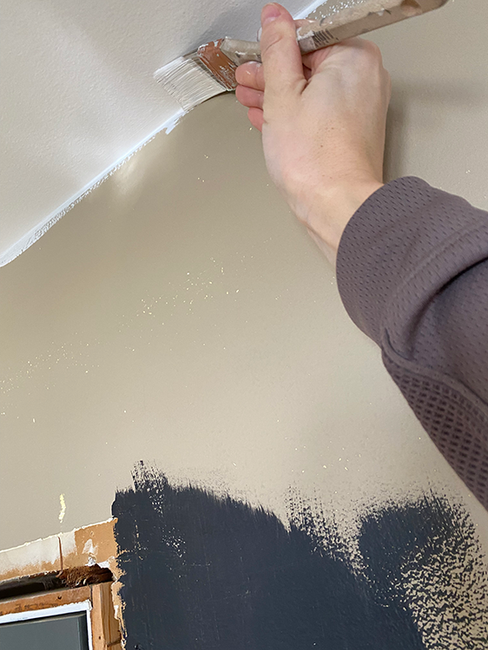
3. Paint your ceilings first (or at least before your final wall coat - sometimes I paint the first wall coat in between my first and second ceiling coats to help speed up the process as I did below). No matter how good of paint you buy, it will still splatter (make sure everything is still adequately covered, floors, furniture, etc). This also allows you to edge the corners of the ceiling first and overpaint onto the walls. It is much easier to cut in on a wall then it is on the ceiling. And unless you have recently painted the ceiling within the past handful of years, do not skip painting the ceilings. You would be amazed at how much freshly painted ceilings can make a difference!
4. Cut your wall edges in before you roll. If you are really good and fast, you can cut in and roll together while keeping everything wet, this is the best way to go. But unless you do it for a living, you likely aren’t that fast (I’m definitely not). So I cut my edges in first so I can roll as close to the edge as I can after (or at least cut in both coats before your final roll coat). The lines with your paint brush are different than your roller, especially the glossier the sheen you go. You want the roll marks to cover as much of the brush marks as possible!
5. I don’t tape, I cut in by hand. Here is the thing with that. Your first coat usually looks pretty crappy, but your second time through will clean up some of the waves in your line. Also, don’t be so afraid - you can always fix a mistake with paint from the other wall/ceiling/trim. In the very corners where the walls meet the ceilings or trim, I usually use an artist paint brush. You can get a pack at Home Depot or Lowe’s.
6. When you start to roll the walls, work in small chunks of the wall to keep a wet working edge at all times. As soon as that roll line starts to get tacky, if you go back over it, you will see those lines in your finished paint.

7. Roll in a couple of directions to get the paint to adhere to all of the wall. Get as close to the corner/ceiling/trim by turning your roller so the arm faces away from that edge to get your roller as close to the edge as you can without getting paint on the other surface.
8. BUT - you need to finish in one clean roll down the wall. Make sure your roller is always facing the same direction when you do this around the whole wall/ceiling. I usually remember which side the roller arm is facing and make sure I keep it that way every time I do my final finish roll. I start at the top of the wall (use a roller extender arm if you aren’t 6’1” like me and can reach my 8’ ceilings) and slowly bring the roller down to the bottom. I also do not abruptly pull the roller off the wall - I bring it off in mid-motion so there isn't a distinct line where the roller stopped).
9. Pay attention to what is getting in your paint. There is dust everywhere (especially if you have 3 furry dogs like I do). Plus, when your roller is brand new, it sheds. A lot. And everything that it sheds is going directly into your paint. I just use my finger to pick these pieces out (yes, my finger is covered in paint when I'm done and as are my jeans that I wipe my finger on, it's ok to get messy)!
10. Sand between coats. This is one of those things that is easy to skip but you again will be erasing some of the hard prep work you did. Even if you were paying attention and picking stuff out in the last step, things are still getting into your paint after you have moved on. So give it a light sand and wash again with a damp rag. Takes 15 minutes and totally worth it!

And now you should have beautifully painted walls and ceilings! While, yes, it will take a weekend of your time, and a couple of gallons of paint - it really is a super inexpensive update for little time and effort!

Let me know if this was helpful and please share any tips of your own that make painting gorgeous walls and ceilings a little easier!
Happy designing + diying!
Katie


Comments