
Kitchen Mini Reno - Cabinets + Countertops
- Katie
- Nov 2, 2022
- 5 min read

Fall One Room Challenge - Week 6

So if you have been following along the last few weeks you know that it has been a rough few weeks trying to figure out how to spray my cabinet doors. So many issues and so many times spraying and then sanding down again to try again. Talk about frustrating. The great news is that I learned a ton in the process. And when Jeremy said I should have just paid someone a few thousand dollars to do it, I was on a mission to prove him wrong. Even if it killed me.
So before we go much further, if you haven’t checked out Weeks 1-5 yet, please read those first so you can see where this kitchen started, my design plan, and what has been done so far! Check them out here! Also, after you are done reading this post, please head over to the One Room Challenge blog to see all of the amazing projects going on during this challenge. OMG you guys, there is so much talent out there. It is just so freaking inspiring!


Well, I’m happy to report I sprayed my final coat on each color and they are looking great! And I’m so pumped about it because you don’t even know how sick of spraying cabinet doors I am at this point. I mean, really sick of spraying cabinet doors. Now I just need to give them as long as possible to cure before I paint the backs and hang them up. This is probably going to be sometime in Week 8 just to give them as much time as possible which means all of my cabinet bases in my kitchen have to stay doorless… bummer. Super bummer when you have really messy cabinets and 3 hairy dogs that are in shedding season. But just a few more weeks.

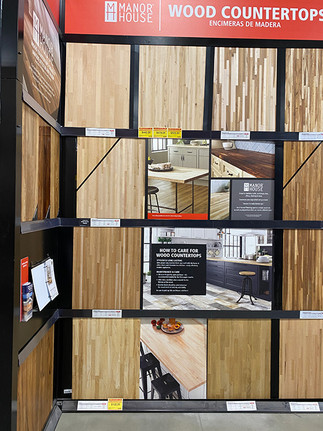


The even more exciting part of this week is that I finally dragged Jeremy to check out butcher block countertops so I could get them ordered. Floor & Decor has a big selection with samples in store to check out so I thought this was the best place to look at options. I already knew I wanted White Oak but Jeremy needs to see things in person. Even bringing the color swatch and tiles to the store, he still couldn’t picture it and couldn’t decided between the White Oak and the Beech.
So we bought one of each and hauled two 8’ countertops home to see what they would look like in the space. If you remember, the plan for the new butcher block countertops is to go on my new giant coffee bar and replace the existing granite on my island while extending the seating area to fit 4 stools. Both of these sections of cabinets are now painted Naval by SW. I also plan to use the butcher block for the open shelving throughout the kitchen as well.


You can see the two options above (White Oak is on the top and Beech is on the bottom) and you can clearly see that indeed the White Oak is the right option. It is going to add so much warmth to this kitchen but doesn’t give off an orangey hue like the Beech does. Hevea is a popular wood that we could have gone with and was a little less orangey than the Beech, but it is actually a softer wood in comparison to the White Oak and Beech. Since these countertops were probably going to take a beating, especially on the island and eating area, I didn’t want to skimp on the hardness of the wood.
So in my kitchen, nothing is standard. Including the countertop sizes/shapes.
Here are the sizes I need:
8’6”L x 25”W - Coffee Bar
34”L x 27”W - Lower Island
52”L x 42”W - Upper Island Seating Area
6 - 10”+ Depth Shelves
The new coffee bar I built needs 8’7” of countertops. A standard in stock size is 8’. Ugh. So I knew I had to order a 12’ one and cut it down. The island is made up of a 27” width by 34” length. A standard width of any countertop is 25”… double ugh. Lastly the seating area will become 52“x42”. Basically both island pieces will have to be pieced together which I have never done by myself before. I made a quick sketch to figure out how I was going to do make all of my pieces out of the stock pieces.

Basically I came to the conclusion that I would need one 8’ piece and two 12’ pieces. I already had the 8’ one at my house, now I just needed to figure out how I was going to get the 12’ pieces home. Our truck bed is only 6’ when it is closed so I couldn’t angle the 12’ piece up and out, the wind would just push it down. And unfortunately the Floor & Decor is not right around the corner… it’s about a 25 minute drive. So I decided I was going to have to put down the tailgate and just strap the 12’ pieces down really well. The guys at Floor & Decor looked at me liked I was crazy but, I had to get them home somehow. And… they made it just fine! Woohoo! When there is a will, there is always a way!


Luckily the end of Week 6 brought a day of warm and dry weather so I could get to work on these countertops. I was pretty nervous to start cutting these countertops, because if I messed up, I really wasn't going to get another chance. I would have to order another one and wait for it to come in. I don't have any extra time for a mess up nor room in my budget. I decided I was going to finish the week cutting the coffee bar top as it was two straight cuts. I would start there and work on the rest of them to start Week 7.


I used my circular saw to cut and clamped down a 4' level as the straightedge guide. I measured about 6 times because I was so nervous. But, luckily, I measured and cut right because this coffee bar has a countertop people! While I still need to cut out the sink hole, it is the right size and now I'm getting REALLY excited for this coffee bar because it is visually starting to take shape!

Next up is to finish cutting and then joining the countertops together. Then they will be ready for finishing and installing! Stay tuned for next week to see how these get finished and installed. And hopefully I’m able to knock out more because I have to catch up from the 2+ weeks of cabinet spraying! Follow along to see how these countertops turned out!
Happy designing + DIYing!
Katie
Check out Weeks 1-5 here:


Comments