
Refinishing hardwood floors
- Katie
- Feb 12, 2022
- 11 min read
Updated: Mar 30, 2022
Welcome to Shiawassee Street (Part 5)

After all the demo was FINALLY done over the course of a couple of weeks, I needed to start to prioritize putting things back together. If you missed parts 1-4 including all the demo and some of the design, check them out here! If you are considering redoing hardwood floors yourself as a first timer, this is a great read to see how I approached it as a first timer.
As far as my Shiawassee Street house was concerned, I needed certain things to be complete in order to move in. Almost the entire house had the original, 100-year-old hardwood floors, all of which looked to be oak with exception of the kitchen. I was torn between doing the hardwoods first and having to protect them during the rest of the renovation or doing them toward the end but having to try to do them when I had already moved in. I decided it made a lot more sense to redo the floors when the house was basically empty and I would just have to ensure I protected them after they were complete (this was most definitely the right call, btw). Polyurethane also has a very potent smell that is not good to inhale so I also didn't want to have to live through that smell over a several day period. So... let me take you on my experience refinishing my floors as a first timer so you can understand what the process entails, what I did + didn't do, and what I learned along the way! If you are considering refinishing your own hardwoods, my experience is coming from a first time DIYer's perspective so you can understand what you are getting into!
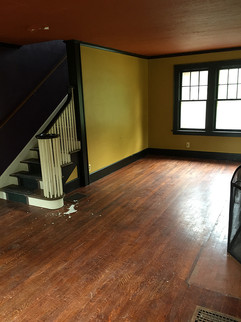
There were 7 rooms + a hallway that had hardwoods. They all had varying levels of damage from a little water damage upstairs from the hole in the roof to some scratches all throughout. The water damage didn't cause any separating of the boards or any warping, so I really just needed to remove the top layer to clean them up of scratches and previous finish. The were also not the color I wanted. The downstairs had a very orangey-red tone to them and the upstairs was a bit lighter but much too yellow.


I decided refinishing the floors was something I could do myself to save a TON of money and I was right. I mean, if I'm going to teach myself / learn how to do something new on my home, might as well perfect the process by doing it over and over again in 8 different spaces, right? Refinishing hardwoods is not difficult. It is just very tedious and definitely takes some finesse. I'm guessing I would have paid someone around $5,000 - $6,000 to do this at the time, maybe even more?? But that was money I knew I could save by a little research and a lot of sweat equity. Luckily for me, I have an extremely awesome mom who volunteered to come up (my family all lives in Indianapolis) and spend two weeks helping me with these floors. Neither of us knew what we were getting ourselves into, and I'm not sure she would do it again if I asked.... but I absolutely couldn't have done it without her help!! Two people makes this project less daunting!

The first step for me was to read up on the best way to attack these floors so I scoured several how to articles and blogs of people that have done this project before. That included what tools I would need, how to use those tools, and what materials did I need to refinish after I sanded them down. Turns out it is a SEVERAL step process. The first major tool needed is a walk behind drum floor sander. These things are $6,000+ so not a tool I planned to invest in. I was able to rent this tool for about $65 a day plus the cost of sandpaper belts. These sanders do the bulk of the room, which was nice because they are the least labor intensive to use, but they only get within about 12" from the wall.
The next tool needed is a handheld belt sander. With so many rooms, this made sense to invest for me and I likely would have spent more on rental than I would to purchase. I bought this model for about $169 - (mine is a Hitachi which has now been bought out by Metabo). It made it through all my floors plus several other sanding projects since then - I would definitely recommend this one!


While the hand belt sander gets closer to the edge of the room, it still does not get close enough to the baseboard (I didn't take my baseboards off and just added shoe molding after I was done since it was 100 year old baseboard that I didn't want to damage). So the last tool to sand down the floors was an orbital sander which would allow me to get right up to the baseboards. I absolutely loved my Bosch orbital sander. I got this model and at the time was only $59 (a little more expensive now, but still worth it IMO)! This lasted me for so many other projects after these floors including sanding concrete countertops! It just keeps sanding!
So lets talking about sanding process. Unfortunately, you do not just sand once and you're done. You must start start with a rough sandpaper, then a finer sandpaper, then a finer one, then the finest sandpaper!! For the drum sander, I believe I started with a 36 grit sand paper. For those of you who haven't done a ton of sanding... the lower the number of grit, the courser the sandpaper. I then worked my way out to the edge of the room, next using the hand belt sander with 36 grit paper, then then orbital with a 60 grit paper. The goal of this first go around is to get all of the old finish off. As you can see in the images... it didn't all come off after the first pass over the floors. When I said this process was tedious, I was not exaggerating! Also, it is extremely important you sand with the grain of the wood - this should be the direction that your planks are running!


As I progressed through the different rooms, I found out that it seemed to work a little better to start from the outside (meaning first the hand belt sander and orbital, then the walk behind drum sander) and work in toward the middle. This also allowed my mom to get ahead of me doing the outside edges while I used the drum sander and we could both be working in different rooms at the same time. I also continued to work through the finesse of using the machines... especially using the drum sander with the most course grit paper. It is extremely easy to let the sander sit in the same place for a couple of seconds. This will immediately create a divot in the floor that is extremely hard to get rid of unless you take another layer or two off of the entire floor.

In order to avoid these divots, I would start with the drum sander leaning back and gradually drop it to the floor as I pushed it forward to start moving forward with the sander. Once the drum belt is on the floor, I just moved at a slow and steady pace, very careful not to stop in any one place. Once I neared the end of the room, I gradually leaned the machine back to lift the belt off of the floor as I continued walking. I found it was a similar process for the hand belt sander -- meaning I gradually put the belt down to make contact with the floor. The orbital is pretty hard to create divots with, its the easiest to work with in that sense. But it also takes the longest to remove material.

I repeated the process as I moved through the different grit sandpapers, moving to a finer sanding grit each time. Almost all of the old stain + finish and the majority of major scratches + imperfections were gone after the first time through. You can see how the floors looked after we did multiple passes with the first sandpaper in this image. The second two times through with finer grits got the rest of the scratches and imperfections out and started smoothing the floors out. (From memory, the grits of sandpaper used for these 2 runs were: Run 2 - 60 grit drum sander/hand belt sander and 80 grit orbital. Run 3 - 80 grit drum/hand belt sander and 120 grit orbital). I don't really know why they were different from the belt sanders to the orbital, but those were what were available at the rental place for the drum sander and at Home Depot for the belt and orbital.
I believe I ended with a 120 grit on the walk behind drum sander and hand belt sander as this was the finest grit they had available. I used a 220 grit for the orbital. You can get the hand sander and orbital sand papers at any hardware store. These grits give the wood a super soft feel to the touch. As a matter of fact, it is one of my favorite things to do when working with wood... feeling the silky softness of the wood after I have sanded with a fine grit sander. I'm weird, I know. But look how pretty those natural wood floors look (I'm a sucker for natural wood flooring these days).


Once you get the floors smooth and soft and clean, they are ready for the next step... STAIN!! (Make sure you thoroughly clean the floors before the stain step. I shop vac'd the hell out of them and used a damp cloth over all of them to pick up the finer dust). The stain process made me the most nervous. Not because of the difficulty, but because I was so afraid I was going to choose the wrong color and have to re-sand everything back down again which I'm not sure my body could handle!! This is where testing sample colors is SO FREAKING IMPORTANT. You don't know how many times I have talked to people in the past few years about staining something any they just went by the color in the little stain brochure. No, no, NO! That color is never accurate to how it will look on YOUR wood. I have almost never chosen the color I would have picked based on those brochures after I put sample colors down.

So pick 4-5 stain colors that you are digging, and put them down in a 2'x2' square on your floor. I know this is mentally hard to do considering you just spent hours (or in my case days) sanding down your floors. Its ok though, these samples will come up pretty easily with your orbital since you don't have to remove old polyurethane or scratches in the floor. It is worth it, trust me on this. If you have multiple rooms, do a sample in each because they may look different in each room. You may love a color in one room but hate it in another. Now take half of your 2'x2' square and put a second coat on because that will darken the stain. There are some premium stains out there now that only need one coat and won't darken if you put on the second coat. I honestly liked the idea of doing two coats in case I missed a spot on the first coat, but you may find you would rather just use the premium stain and do one and save yourself a day! Once you have chosen your color, sand off the sample sections (even the color you chose) so your floors are back to natural wood.

If you can get a big enough can to do your entire space, that is best. There is some variation from one can to another so it is better if you can finish the job all from the same can! And make sure you stir extremely well (and continue stirring through the stain process), pigment can settle to the bottom of the can creating variations in color as you work through the can. I used Minwax in Dark Walnut. It was available at Home Depot at the time (I think they only carry Varathane now). It took me two coats to get the desired color. I chose this color because it is a good medium brown with very little red/orange undertones. I wanted to keep the floors classic to the 100 year old house and I think medium brown is a safe color that isn't super trendy and will mesh with many styles.
In order to apply the stain, I bought a bag of t-shirt rags or you could literally use old t-shirts. T-shirt rags have always worked the best for me with staining projects as they do not leave any fuzzy residue. I have bought other rags that say they are made for stain and they leave poofs of fuzz all over my wood which is not what you want to be picking off your floors before your polyurethane. Here's the deal with staining. You use one rag to dip in your stain and apply across the wood. You do not want to leave any excess stain on the wood. Going really thick with stain isn't going to save you a step in having to do another coat. Any excess stain pooled on the wood is going to leave a sticky area. I used a second clean rag to go back over the area I just applied and wipe it back off to remove any excess stain. Eventually my wiping rag would get too saturated for wiping and that would become my applying rag and I would grab a new rag for the wiping. I would work in about a 4'x4' area at a time. You can see my in process images below. Look at all that beautiful grain being enhanced with the stain! I was loving it! This is when it gets exciting and you can start to see the fruits of your labor!


The last and final step is the protective finish. Because I had so many square feet to do and I wanted these floors to last, I didn't want to just use whatever was in stock at the local hardware store. I did a little research and found that DuraSeal Polyurethane was highly recommended by a lot of pros out there. I did the math on how much I thought I would need and ordered two 5-gallon buckets of this stuff in Satin (turns out I only needed one... oops)!
The process for the Poly is to apply with a lambskin applicator. I got this one in stock at Home Depot and it attached to a painting pole and you can see what it looks like below. The floors need to be pristinely clean before you start this. Any dirt, dust, or debris that is on the floor will be locked into the polyurethane and you will be able to see it. Not what you want in your brand new floors! DuraSeal recommends using a cloth moistened with Mineral Spirits. I honestly can't remember if I did this or just used a damp cloth (with water) and then a tackcloth just before I put the poly down. I do know that I would re-wipe the area again just before I spread out the poly as I worked through the room. Using the lambskin applicator on a pole, I would dip it in my paint tray filled with polyurethane and spread it around the small area. I then would go back and smooth my strokes out so everything had an even coat. I decided to do 2 coats of poly for extra protection and I planned to have my 2 dogs living in this house with me. Please note, you need to have ventilation when doing polyurethane. The smell is pretty rough and not good for you to breathe in.


While this was a process that lasted several days, I was absolutely in love with my new floors and even more pleased with all of the money I saved by doing them myself. Now, both my mom and I could barely walk after being on our hands and knees sanding, staining, and poly-ing for multiple days in a row! Would I do this project again? Well, I think I would do it again if I had a house I was not living in. I'm not sure I would want to do it if I was living in the house -- I would at least get a hotel room for the week if I were going to do this to my own house. But, lets be real, it is almost just as disruptive to have a professional redo the floors if you are living there too. They may be a little faster but it is the same multiple day process that creates a lot of dust throughout your house! After saving about $5-6K on this, I'd say it was totally worth it! Let me know what you think of my finished product! Check out earlier parts of the Welcome to Shiawassee Street blog series all about my journey renovating my 100 year old house below! Stay tuned for next week when the bathroom starts getting put back together!!!


Check out our previous posts about this home's renovation: