
The Final Details
- Katie
- Mar 30, 2022
- 9 min read
Welcome to Shiawassee Street (Part 10)

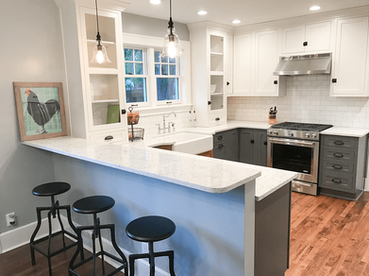
Most of this 100 year old house was almost done and just needed a lot of paint and some exterior love. As many of you read last week, I finished my dream kitchen in this house! If you have not had the opportunity to read last week or any of the previous posts, please check them out here! A lot has happened since the beginning!
When I bought this house, it was a way for me to start over on my own after going through a divorce. I planned on staying here for quite some time and had so many other projects planned for the longterm future that I wanted to do at a later date after the major renovation was finished. I had recently started dating someone (my now fiancé) and would go visit him on weekends, especially in the Summer as he lived on Lake St. Clair. I really liked my job at the time running a distribution center for Meijer (that is a Midwest grocery store chain for those of you who do not live in this area). And I was really liking how this house was turning out. It was in such a cute little historic neighborhood in downtown Lansing, I was super close to work, to where I played volleyball with all of my friends, and to downtown for bars and restaurants! In other words, I liked where I was in my life and had no real plans to make any changes in the near future.
But then a recruiter called from Amazon. Being in the distribution industry... Amazon is about as big as it gets. So I figured, well, going on the interview can't hurt. Turns out they made me a crazy good offer after the interview process. The only problem was, there was no Amazon in Lansing. There wasn't even an Amazon in Michigan at the time. Man, that was tough! I had been in Michigan for about 15 years and was finally getting settled in and getting oh so close to finishing this house that I was falling in love with! I went back and forth for a couple of weeks but finally decided that I had to give the job a try... which meant I would be moving to the metro Chicago area. So I told them I needed about a month before I could start so I could finish this house and get it on the market!
Here was what was on my list to get accomplished:
- Paint all interior walls not yet painted
- Paint trim, doors, and built-ins (my original plan was to strip these down back to natural wood and stain, but there would not be time for that)
- Add shoe molding to all of the baseboards
- Paint Exterior Siding + Trim
- Reglaze original windows
- Finish the other half of the Fence
- Landscaping
- Stage with furniture
In other words, there was a lot to do. The interior painting alone was daunting let alone the rest of it. I had a feeling I would have to hire some of the work out just to get it done in time. Luckily, my family wasn't sick of me yet and were willing to come up and help with several parts of what I had left. I painted at every chance I got. You can see by the literal PILE of paint for just the inside, there was so much to paint.

My mom is a much better trim painter than I am and I am much better at rolling on the walls so we divided and conquered. We just painted and painted and painted. This was over the course of several weeks. In the meantime, I figured there was no way I had the time, nor was it likely the safest for me to try and paint the exterior of the house. It was an awful tan color with a pinky-maroon trim and a green roof. Yikes! You can see a reminder of the exterior below.


I decided to go with a light gray with white trim that would pair nicely with the darker gray roof that I had put on when I first purchased the home. I had always planned on painting the dental molding and accents in the porch and dormers, however, due to time and cost, that just wasn't in the cards. I hired a company to reglaze all of the original windows that were still present and paint all of the trim and siding on the exterior. You can see the in progress images below.


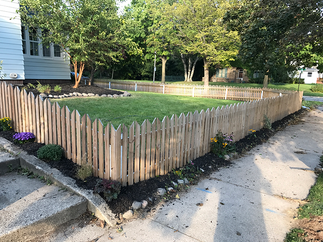
While all of this was going on, I needed to finish the other half of the fence. Originally, one of the very first things I did when I bought the house was to fence in the main portion of the yard (to the right of the front door, wrapping around to the other side of the house). I planned for my two dogs to move with me so they needed a fenced in yard. Since this house was on a corner, it had no backyard, just the front and side yards so I had to make do with that for the dogs. Benson and Stella were having a blast during their first visit to the yard!!
When I built the first part of the fence, I planned to make my own pickets. The ones you can buy at the store are kinda ugly and expensive. So I bought a ton of treated 1x pine boards. My original thought was to cut a triangle point at the top of each picket. I realized really quickly after trying to cut the first one that it would be miserable to try to make those. But I wanted a similar look. So I just cut a 45º on the top of each picket with plans to alternate the direction to create larger triangular points meeting in the middle of 2 pickets. It gave a really cool and unique look that you do not see everyday! My original plan was to paint the fence after it had a year or so to dry out. You can see the before, after, and dog pics of the main part of the yard that was done before I moved in!
Fence before:


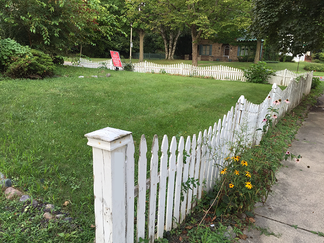


Fence after:


Dogs enjoying fenced in area:


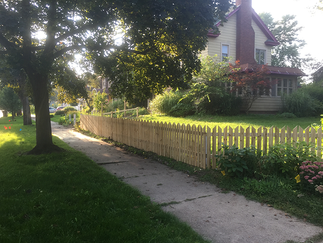
Since I was in a hurry to get the main part of the fence done so I could move in with the dogs back in the previous year, I never put up the fence to the left of the front door. The house just felt uneven and unfinished without a fence on that side so my dad came up to help me to the other side.

While I always planned to paint the fence... there was no time to 1. do it or 2. wait for the wood to dry out for the paint to stick well. Just for reference, treated wood is usually pretty wet with the green chemical put on it to make it more water resistant. Paint will not stick as well to wet lumber. Treated wood (or water resistant woods like Cedar) should always be used for exterior projects. Untreated pine would not last long, especially in the Michigan elements! If I would have gotten the opportunity to stay in the house longer, I was dying to put several raised bed gardens in this newly fenced in area! I love vegetable gardening and I thought this would be the perfect spot for it!

Now that the rest of the fence was done, the interior and exterior painting continued, other small projects were knocked out. I popped up shoe molding around all of the baseboards so we could paint all of the baseboards. If you remember back to Part 5 when I refinished all of the hardwood floors, I did not remove the baseboards when I sanded them. I wanted to keep the gorgeous original baseboards, but since you cannot get right up to the baseboards when you are sanding... you have to add shoe molding to cover up the unsanded/finished edge. I wanted to keep working regardless of the weather so I figured I would work on the outside during nice days and work on the painting and shoe moldings during rainy days. It was a Michigan Fall so you really don't know what you are going to get for weather! You can see that my trips to Home Depot were to cover the multiple projects I was working on. I swear I was sometimes there 2-3 times per day! They definitely knew me by name from the year of renovations!
During one of the nice days, my mom was in town and we decided to get busy on the landscaping. I didn't want to spend a lot of money since 1. it was about to be winter and 2. the house was getting listed within the month. You could tell there were some existing plants buried under the weeds. But they were buried DEEP! I must apologize to all of my neighbors during the previous year while I was renovating the inside because I truly neglected the yard! Holy moly was it bad! (I mean it was this bad when I bought it too, but I still felt bad). So my mom and I went to WORK.

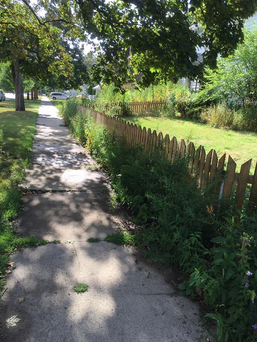


We dug so much crap up. SO MUCH CRAP. We chopped and hoed and pulled and dug and trimmed and pruned until we pulled all of the weeds out and cleaned up the existing trees/plants. There were quite a few larger rocks scattered throughout the property so this seemed like the perfect and FREE edging for some of the landscaping beds. We created a bed around the house and filled with mulch. Like I mentioned above, we tried to reuse any existing perennials that were already in the beds or surrounding the fence line. We added in some mums that would bloom during the fall, hopefully when the house would be on the market and called it a day! Well, 2 days.... of the most back breaking yard work ever!


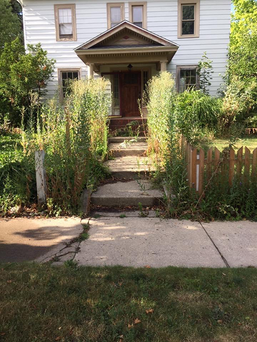
A few more details on the exterior were needed to make the house feel complete - I decided to paint the front door. I believe the front door was original to the house and it was solid wood... which I would have LOVED to keep as wood, but there were several holes that I had to patch which was preventing me from keeping it as wood. So I wanted something bright.
For some reason, turquoise was calling me for this house to really make that door and porch pop! Ironically, when I was 14, my parents bought a fixer upper for us to move into. It was a limestone house that had not been touched since the 1970s and had a turquoise front door, trim, and shutters. When they showed me this house that would end up being our home, I cried because I thought it was so ugly! Who on earth would ever paint their door turquoise?!?! (You can read the full story on my bio page) Well, it had now come full circle and I was adding that same flair to my own door. And I loved it!


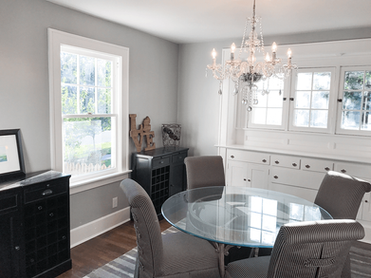
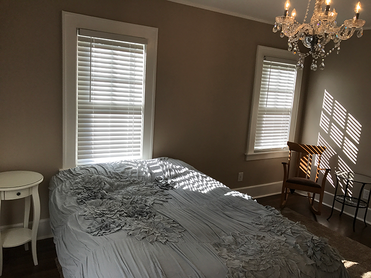
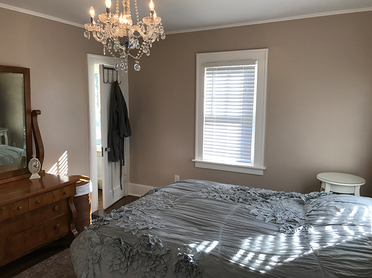
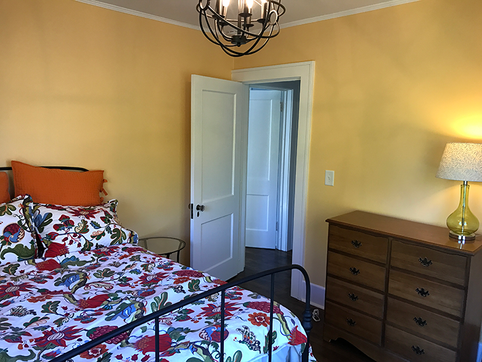
With most of the projects coming to an end... it was time to start bringing in my furniture that had been stacked in my basement for about 9 months. After going through a divorce and a move/renovation, I had a bit of a mish-mash of furniture and didn't plan to buy anything new since I would be moving to a new house and didn't know what I needed yet. But I made it work with what I had! See those turquoise shutters in the middle pic?? You guessed it! They came from that house my parents bought when I was 14 (and have been incorporated in all of my houses since they sold that house and had to get rid of the shutters).


Things were nearing and end and I was getting to enjoy just a little bit of the fruits of my labor. I always imagined I would drink my coffee in the sunroom every morning and I finally got to sit in a chair and enjoy my first cup of coffee there while I looked out the windows.

As my time in the Shiawassee Street House was ending, I was having serious sadness about never getting to enjoy all the hard work I put into this house. I was exciting for my next adventure but it was so hard to leave this house, my hard work, and all the other plans I never got to do. But it was time. I literally finished all the projects the Saturday before I had to start at Amazon in Chicago that Monday. I was painting the steps on my way out the door, locked it and drove to Chicago to start my new life! To revisit all of the before pics of this house, you can go back to Part 1! Here are all of the after pics I took the day I left and never looked back:


I would love to know what your thoughts are of the entire Shiawassee Street House now that I am finished sharing it with you! It was truly a labor of love that I learned SO MUCH along the way. I absolutely couldn't have done it without the help of my mom and dad, who each came up on multiple weekends from Indiana to help with so many different projects!
Knowing everything I know now, I'm sure I would do some things differently and I definitely would have done things differently if I knew I was going to sell it right after I finished it! It was never meant to be a flip house so I made decisions that were for me and much more expensive than if it were a flip house so I really didn't make much if any money on this house but I hope that the new owners get to enjoy the house! The one thing I definitely did get from this house and renovation was a true love for interior design which I am not pursuing as my career so I can share my passion and knowledge with others!!
If you did not get a chance to see any of the previous posts - you can check them out below! Thanks for following along with the Welcome to Shiawassee Street Series!
-Katie
Previous Parts of this Series: